It seems to be a too commonly held belief that, if your soil isn’t acid, you can’t grow heathers. Not true – Everyone can grow heathers!
If your soil is light, sandy and acid, then you are very fortunate. However, if you are not one of these lucky few, you can still have a colourful, healthy, display of these beautiful plants – you just need to know which ones you can or can’t grow successfully. If you are not sure whether your soil is acid, neutral, or alkaline, simple and inexpensive soil testing kits are available from most garden centres.
Many heather growers indicate on their plant labels whether the heathers are suitable for acid or alkaline soils, which is very useful. But, even if they don’t, by following a couple of simple guide lines, you can ensure that you buy plants suitable for your own soil conditions.
The right plants for your situation
First – look at the first two names on the plant label, which (unless you have found something unusual) will almost certainly be one of the following: Calluna vulgaris, Daboecia cantabrica, Daboecia x scotica, Erica carnea, Erica ciliaris, Erica cinerea, Erica erigena, , Erica tetralix, Erica vagans, Erica x darleyensis, Erica x griffithsii or Erica x watsonii. These are the species/hybrid names.
Second – from the chart below, find which description fits your soil situation most closely, and note which of the heather species will succeed for you. Unless you know your soil is acid it is best not to be tempted to buy un-labelled plants.
These are not the only species/hybrids you may come across at garden centres and nurseries, but are certainly the most common ones. For a full, descriptive list of cultivars of Callunas, Daboecias and Ericas go to the heading ‘Heathers’, situated on the green bar at the top of the page. This list includes rarer cultivars that are more difficult to obtain. For pictures, click on the ‘picture bar’ on the Home Page.

The above recommendations apply to the UK, or any country whose average winter temperatures do not fall below about -12o C. If average temperatures are below this, then many species will still thrive, and you can obtain specific recommendations in relation to your particular climate from The Heather Society
Choosing your heathers
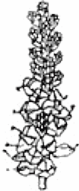
Calluna vulgaris (Scottish heather or Ling): Flowers from late summer until well into autumn and there is a vast range of colours to choose from, both in flower and foliage. Heights range from around 60cm, down to cultivars that hug the ground – with all shapes and sizes in between. Needs an acid soil.
Erica ciliaris (Dorset heath): In bloom from mid-summer until autumn. A very attractive heather, with flowers in long colourful racemes ( not as widely available as the others).. Heights range from 30cm, down to around 15cm. Needs an acid soil
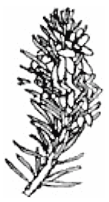
Erica cinerea (Bell heather): Flowers from early summer to early autumn. It probably has brightest range of colours of all the summer flowering heathers. Heights range from 45cm to around 20cm. Erica cinerea does best in a light sandy soil, which doesn’t get too wet in winter. Needs an acid soil
Erica tetralix (Cross-leaved heath): Flowers from early summer until autumn. In the wild it grows naturally in boggy places, but will stand much drier conditions in the garden. The dainty red, pink or white flowers are held in clusters at the top of 15 to 20cm stems. Needs an acid soil
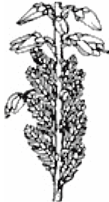
Daboecia cantabrica (St Dabeoc’s heath): Flowers from June until late autumn. Avery attractive heather, with glossy green leaves and large urn-shaped flowers, in shades of red, pink, lilac and white. Height – around 50cm or less. It will tolerate some shade. Needs an acid soil.
Daboecia x scotica : In effect, this dainty hybrid between Daboecia cantabrica and Daboecia azorica, is a smaller version of Daboecia cantabrica , with similar leaves and flowers , but a more compact habit. Heights range from 35cm down the diminutive Daboecia x scotica ‘Ben’ at 10cm – perfect for a trough garden. Needs an acid soil, but will tolerate some lime if the soil is well drained.
Erica vagans (Cornish heath): Flowers from mid-summer into autumn. The flowers are long upright racemes, in shades of cerise, pink, cream and white and there are also some beautiful golden foliaged cultivars. Height is around 45cm. Will thrive in alkaline, neutral or acid conditions, as long as the soil it is not deficient in magnesium.
Erica carnea (Mountain heath): Flowers from early winter into late spring – just when colour in the garden is needed most. These are low-growing, ground-covering plants, around 20cm in height, which will give pleasure for many years with the minimum of attention. The flowers range from red, through pink and lilac to white and there are many with superb coloured foliage as well. It is happy in acid, alkaline or neutral soil as long as it isn’t too heavy or waterlogged.
Erica erigena (Irish heath): Mostly flowers in early spring , although some cultivars start in late winter and a few even put on a show in late autumn. It is the least hardy of the hardy heathers, but even if it knocked back in an exceptionally hard winter it will usually recover from the base. Erica erigena is a useful plant, not only because it is lime tolerant, but because it fills the gap between the winter/spring flowering heathers and the summer flowering ones. It is also more upright growing than many other heathers – very useful to give a bit of height to the border. The plants may also be grown as a hedge Heights range from the well named Erica erigena ‘Superba’ at around 180cm, down to the dainty Erica erigena ‘Nana’ at 20cm. The flowers range from white, through pink, to mauve and salmon, with foliage in shades of green or yellow. Will tolerate acid, neutral or alkaline soils.
Erica x darleyensis : An attractive and very useful heather, It flowers from late autumn, right through until late spring, in many shades of red, pink, lilac and white. There are also some lovely foliage colours. Erica x darleyensis cultivars can be quite vigorous, providing good ground cover, which will quickly smother any weeds – just watch out it doesn’t also smother its more delicate neighbours. Heights range from the very vigorous Erica x darleyensis ‘Arthur Johnson’ which can reach 90cm ( but can be easily kept under control with an annual trim) down to the more usual height range of 40 to 60cm. It is happy in acid, neutral or alkaline soils.
Erica x griffithsii: This elegant plant has long flower spikes in shades of pink. Some varieties have golden foliage and some are highly scented. Flowering time is from July through to October or November. Heights range from 90cm down to 45cm. Will tolerate acid, neutral or alkaline soils.
Erica x watsonii: A dainty plant, which flowers from June or July into October or November, depending on variety. Flowers range from purple, to lilac and pink, through to white. As a bonus the foliage has attractive coloured tips in the spring. Heights are mainly around 30cm. Needs an acid soil.
Pruning
Calluna, Daboecia, Erica ciliaris, E. cinerea, E. vagans : The general rule is to cut the stems down to the base of the flower stalks once they have finished flowering. However, as some will continue flowering well into November, it is usually best to leave the pruning until early spring to avoid frost damage to the newly cut stems. Callunas such as ‘Spring Torch’ or ‘Spring Cream’, which have brightly coloured new growth in spring, are better pruned in the autumn.
Eric carnea: Pruning is rarely necessary, unless you need to trim the plants in order to keep them under control in a confined space. However, prune them no later than May, or you may be cutting off next winter’s flowers.
Erica erigena : Does not need pruning unless it is necessary to keep to a particular size. In which case, prune when the flowers are fading to avoid trimming off next spring’s flowers.
Erica x darleyensis: As these are such exuberant heathers it is advisable to trim them annually, if only to stop them smothering their less vigorous neighbours. Prune no later than May.
If you have a large heather bed or border, pruning individual plants can be a major operation. An easier option, which gives a good result, is to go over them with shears or a hedge trimmer at the recommended time. This annual treatment will keep the plants rejuvenated for many years.
Planting
Heathers grow best in an open, sunny situation. The winter/spring flowering heathers will tolerate some shade’ but won’t flower as well. Golden foliaged varieties will need to be planted full sun in order to keep their bright colours.
Plant heathers so that the foliage is resting on the ground and no part of the root ball is showing above ground. Compost can be mixed in with the soil when planting, but never plant into pure compost. Make sure to buy ericaceous compost when planting acid-loving plants. Keep well watered until they are established.
So – Everyone can grow heathers. It is true that, without an acid soil, you can’t grow the full range of these beautiful plants (except in containers). But, if your soil is neutral or alkaline, just forget about the summer heathers, there are plenty of other plants you can grow in the summer. There is absolutely nothing more cheering in those dark days after Christmas, than a bed or border of winter/spring flowering heathers – their brilliant colours brightening the winter gloom and giving several months of pleasure. On sunny days, an added bonus is the sight (and sound) of all the bees foraging among the flowers, grateful for nectar at a time when food is short.
For a more comprehensive introduction to heather growing, a booklet, Everyone Can Grow Heathers is available through the Heather Society at £3.50. Better still, join the Heather Society and get the booklet free, plus access to plenty of friendly, helpful, advice from other heather lovers.
Daphne Everett
Click this to download a PDF of this guide A Beginners’ Guide
A compost into which rooting can take place can be prepared from 3 parts sphagnum moss peat (do NOT use sedge peat as this can often have a high pH) and one part of horticultural perlite. An acid gritty sand can be used instead of perlite where available but it must be acid. This applies even for the propagation of heathers which would normally grow in any soil, as an acid medium will improve the rooting yield. There is no need to add fertiliser at this stage, in fact, the yield is likely to be higher if none is added.
If horticultural perlite is being used add water to the perlite as instructed by the manufacturer, otherwise for easy mixing and subsequent handling, there is no need to add extra water at this stage.
Heathers can be propagated by layering, cuttings, or by seed.
To increase your stock of heathers, they must be propagated vegetatively to remain true to the parent plant. Heathers produced from seed, even from foliage cultivars, will vary considerably, from ones indistinguishable from moorland plants to perhaps a new find unlike any available commercially. However, there is more chance of winning the lottery than obtaining a truly different plant!
Propagation from seed is often used where heather is needed for restoration work or for such areas as golf courses.
EUROPEAN HEATHERS – hardy heaths including northern hemisphere species of Erica, Calluna vulgaris (ling) and Daboecia (St Dabeoc’s heath)): for Cape heaths see below.
Collecting seed
Seed may be obtained from all European species and many of their cultivars. The best time to collect seed is a few weeks after flowering. When ripe, on a dry day, capsules can suddenly dehisce releasing all their seed. Always remember that when collecting seeds they should be put in a dry container or envelope and labelled.
Hybrids of European heathers (for example Erica x darleyensis) are normally sterile and therefore do not produce seed.
If you intend to attempt to produce particular progeny then the parent plant must be protected from pollination by insects, and must be hand-pollinated using pollen from another plant that also has not been visited by insects. Where pollen is taken from one species or cultivar and placed on the stigma of another there is potential for hybridisation.
Sowing seed
The best time to sow seeds is in Spring or Autumn. Autumn (September and October in northern hemisphere) is preferred.
Take a wooden or plastic seed tray 75-100mm (3-4 inches) deep, and place a 5mm (0.25in) layer of fine gravel in the bottom, and then a layer of washed potting grit 5-10mm (0.25-0.5in) deep. Mix a proprietary ericaceous compost with Cornish grit (or fine granule Perlite) and/or fine washed potting grit and silver sand in a ratio of 3:1:1:1 and fill remainder of seed tray. Soak seed tray in rainwater until the surface has become damp.
Mix the seed with dry silver sand and sow evenly over the surface, and then sieve a thin layer (not more than 2-3mm (0.1in) deep) of dry washed grit and/or silver sand over the surface; this will help to retain moisture and inhibit the growth of moss, as well as protect and cover the seeds. It may be beneficial to spray the surface with a proprietary herbicide (for example, Mogeton) to prevent mosses and liverworts growing. Label the seed tray, and place it on a bed of fine gravel within a larger tray which has been watered – this will allow a more even take-up of water by capillary action. Do not allow seed compost to dry out at any time, and do not keep the tray sitting in deep water. Mist-spray the surface of the compost, by hand, at least twice a day in warm sunny weather (less frequently in cool, cloudy conditions and the dull winter months), and continue even after seeds have germinated; misting helps to keep the soil surface moist and cools the seedlings. Keep the seed tray in a shaded part of a well-ventilated greenhouse, out of intense direct sun, to prevent rapid evaporation from the soil surface even after seedlings appear, as this helps prevent them drying out.
After one to three months seed should have germinated. At first the seedlings have two green leaf-like cotyledons; then the true leaves appear. To prevent seedlings becoming too leggy, pinch out the tip if they are over 25mm (1in) high. This will make them sprout side shoots and stimulate growth.
Transplanting
Seedlings are ready for transplanting six months to one year after germination. Use a stainless steel household fork and/or skewer, or proprietary small gardening tool to remove seedlings from tray, taking great care to avoid damaging the roots which are normally much longer than the stem and will probably have reached the base of the seed tray. If you need to hold a seedling, hold it by the leaves at the very tip of the shoot.
Mix ericaceous compost with Cornish grit (or fine granule Perlite) and silver sand in a ratio of 3:1:1, adding a little fertilizer (it is best to use granules, and follow the instructions of the manufacturer). Use this to fill small 75mm (3in) pots or compartmented seed trays. Soak the filled pots or trays in rainwater until the surface is moist. Use a dibber or a finger to make a deep hole in the compost, insert one seedling, and firm the compost lightly around it. Spray with water and place the pots or trays in a larger tray filled with fine gravel, and keep watered. Do not allow the soil in the pots or trays to dry out, nor to sit in deep water.
CAPE HEATHS
Heather seed can be triggered to germinate by fire and light, so germination is increased if the seed is heated to 120ºC for 30 seconds before sowing in the propagation compost. Recently it has been discovered that in addition to the more obvious effect of heat, the smoke from fires is responsible for stimulating the germination of seed of many Erica species in South Africa. It is thought that this effect would hold true for hardy heather species as well.
Smoking seed
- 1. Seed is sown in conventional plastic trays and is covered by a thin layer of soil.
- 2. The trays are placed in a polythene tent and smoke is pumped into the tent by means of a plastic pipe from a large metal drum.
- 3. The smoke is generated in the drum by burning a mixture of dry and green leaf and stem material which should resemble as closely as possible the vegetation found on heathland.
- 4. The trays are left in the smoke for 1 to 2 hours.
- 5. The seed trays are then placed under cover in the shade until the seeds have germinated. Germination can take as long as six months.
- 6. The best time to sow and treat seed is in the late Summer and early Autumn when day/night temperature fluctuations are at their maximum.
Primer procedure
It is now possible to obtain a primer solution containing a combination of natural substances which have been found to overcome dormancy and stimulate seed germination. It takes the form of an impregnated paper disc which can be obtained from Kirstenbosch National Botanical Garden, Claremont 7735, South Africa.
- 1. Place a primed paper disc in a cup. Add 50ml of water and wash the primer from the paper.
- 2. Soak seeds for 24 hours in the primer solution.
- 3. Retrieve seeds by pouring the solution on to filter paper so the solution drains into a receptacle.
- 4. Mix seed with dome dry silver sand and sow in conventional plastic trays and covered with a thin layer of sieved “compost” (peat + grit + silver sand mixed).
- 5. Add 950ml of water to the filtered primer solution.
- 6. Water seed trays carefully with primer solution using a fine hand spray.
- 7. Keep wet with solution for at least 24 hours. Water thereafter as normal.
This is the simplest and most reliable method for the gardener who wants just a few plants of a particular variety.
- 1. Select a branch or number of branches on the outside of the plant.
- 2. Make a shallow trench with a trowel into which the selected branch can be drawn.
- 3. Fill the trench with a mixture of sphagnum moss peat and grit sand.
- 4. Draw the selected branch down into the trench, taking care not to break it.
- 5. Peg it down firmly with a wire hook about 15cm (6 in) long, making sure that the tip of the branch is turned upwards.
- 6. Cover the branch with the peat/sand mixture and mound up around the now upright tip.
- 7. Water well.
A layer can be made at any time of year. Nine to ten months later a root system will have formed at the bend in the stem where it was pegged, and the new plantlet can then be severed from its parent and planted in its final growing position. Several such layers can be made around the plant without affecting its appearance.
A development of this technique is to dig the plant up, make the hole considerably deeper and re-plant so that only the growing tips show above the soil. These will produce new roots and can be severed from the old plant after about 6 months.
The most common method of producing heathers is from cuttings. Many gardeners have trouble rooting heathers from cuttings but if a number of simple rules are followed, a high success rate can be achieved.
Choice and preparation of cutting material – species by species
What happens when a cutting roots? Why do some species root easier than others? Why do cuttings root easier at certain times of the year? These questions and many others like them arise irrespective of what form of propagation is used.
Rooting depends upon many inter-related factors, some beyond our control, but other aspects are helpful in determining the type of material we should select. In general, cuttings should be taken from healthy, vigorous plants, preferably not more than three years old, but other aspects are more species-dependent. There is no need to use rooting hormones for hardy heathers.
Calluna vulgaris
Calluna vulgaris cuttings can be taken in April using the leafy growth appearing above last year’s flowers. In this case, select stems where the leafy growth is at least 1cm long. Cut the stem with a sharp knife 2cm below the leafy growth. Remove any dead flowers by rubbing your finger and thumb down the stem.
Preparation of Calluna vulgaris cuttings in April
Calluna vulgaris cuttings can also be taken during July and August from the growth just below the flowering stem. Select stems which are firm and just turning straw brown. Discard stems where the leaf nodes are more than 2mm apart as these will be more difficult to root and make a less shapely plant. Cut the stem with a sharp knife immediately below the flowers and then cut again to create a cutting 4 to 5cm long. Remove the leaves from the lower 2cm of the cutting by rubbing your finger and thumb down the stem.
Preparation of Calluna vulgaris cuttings in July
Daboecia
Daboecia cantabrica and Daboecia x scotica cuttings are best taken in July. Select side shoots which are firm and just turning to straw brown about 4 to 5cm long. Pull down carefully to tear the cutting from the main stem so as to leave a small ‘heel’ at the base of the cutting. Remove the leaves from the lower half of the cutting by pulling downwards. Sometimes this type of cutting is not readily available, in which case prepare in a similar way to a July Calluna cutting.
Erica carnea
Erica carnea cuttings are best taken in July or August by selecting stems which do not have buds forming on them. Ideally heel cuttings about 4 to 5cm long are best but if in short supply a tip cutting can be prepared but cut off the top 5cm of growth with a sharp knife. Avoid stems where the leaf nodes are more than 2mm apart. The lower half of the leaves should be removed by rubbing a finger and thumb downwards along the stem.
In the case of the heel cutting, nip out the growing tip. As Erica carnea flowers profusely, it may be difficult to find cutting material without buds, in which case these will have to be used. Prepare as above but remove all flower buds by rubbing a finger and thumb upwards along the stem.
Erica carnea cuttings can also be taken in March and April. At this time of year use the top 5cm of growth but do not pinch out the growing tip. Nature has already provided a number of embryo shoots, more in fact than you can create by pinching out the tip.
Preparation of Erica carnea cuttings
About two weeks after the cuttings are taken, a gradual swelling of the whole stem is observed. After three to four weeks roots always start to form above a leaf nodule. After about ten weeks, more roots can be observed coming through the callus formed over the nodules. These tend to be rather weak compared to the other roots which are well developed by this time.
Erica cinerea
Erica cinerea cuttings are best taken during July and August, using non-flowering heel cuttings. If available, these are likely to be quite small, 1 to 2cm long. Remove the leaves from the lower half of the cutting by rubbing finger and thumb down the stem. Often heel cuttings of this type are difficult to find, in which case the stems below flowering shoots can be used, provided the spacing between the tufts of leaves does not exceed 2mm.
Cut these from the plant in a similar way to that described for July Calluna cuttings, but as roots usually only appear from the base of the cutting, make sure the lower cut is made immediately below a tuft of leaves. Remove the leaves from the lower half of the cutting.
Preparation of Erica cinerea cuttings
This species roots by producing a large swelling at the base of the cutting (it does not seem to matter whether it is a tip or heel cutting). The time it takes to do this varies considerably. Roots appear two to three weeks later. It only rarely roots around nodules, which may account for the increased difficulty most propagators have with this species.
Erica ciliaris, Erica mackayana and Erica tetralix
These species root in a similar manner to Erica cinerea.
Erica ciliaris, Erica mackayana and Erica tetralix cuttings are best taken during July and August using non-flowering heel cuttings about 1 to 2cm long, which are usually plentiful. Remove the leaves from the lower half of the cutting as described above.
Erica x darleyensis, Erica erigena and Erica vagans
These species root in a similar way to Erica carnea. Interestingly, Erica x williamsii behaves in a similar manner to Erica tetralix despite the leaf attachment being closer to Erica vagans. Erica x darleyensis, Erica erigena and Erica vagans cuttings are best taken in August, making particularly sure in the case of Erica erigena that the stem is semi-ripe, i.e. firm and turning to straw brown. Take and prepare heel cuttings 3 to 5cm long as described for Erica ciliaris.
Methods of propagation
Once a cutting has been severed from the parent plant, it will continue to loose moisture via the leaves until such time as it produces roots. The two basic ways of rooting heather cuttings attempt to keep this transpiration loss to a minimum. The first, open to all amateur growers and described below, relies on keeping the cuttings humid, the second is more sophisticated; mist propagation.
“Close polythene” method
This method relies on keeping cuttings humid to minimise transpiration and is suitable for rooting most of the widely grown hardy species of heather. There are many adaptations of this method, depending on whether small or large quantities of rooted cuttings are being produced.
The main danger with this approach is the risk of fungal attack. If small numbers are required, the following method minimises that risk
- 1. Place some sand into a 100mm (4″) clay pot.
- 2. Place a small amount of compost at the base of a 150mm (6″) plastic pot.
- 3. Place the clay pot inside the plastic pot and lightly firm more compost in the ring between the two pots.
- 4. Dib holes with a nail about 2cm apart close to both edges.
- 5. Place the cuttings in the prepared holes but do not firm them in.
- 6. Once the pot has been filled, water heavily so that compost seals the holes.
- 7. Leave for 20 minutes and seal the plastic pot in a polythene bag (one with no holes in it), ensuring that the polythene is kept clear of the cuttings.
- 8. Place the pot against a north wall or in light shade under a bush or a place where the sun cannot play on the polythene bag. NEVER PLACE THE POT IN A GREENHOUSE as the temperature variation is too great, nor in a propagator unless you are prepared to spray the cuttings five or six times a day.
- 9. Leave for several months, checking occasionally that the polythene bag is fogged. If not, heavily water the sand in the centre pot, and re-seal. Any cuttings that die should be removed to minimise disease.
- 10. To check that rooting is taking place, lightly pull the cutting. If resistance is felt, you can be sure that rooting is taking place. Those not rooting will come out easily and can be replaced just as easily.
If slightly larger numbers required, the twin pot approach can be replaced by a plastic seed tray. Lightly firm compost into the tray and dib holes 2cm apart. Follow steps 5 to 8 above. Leave for several months, checking occasionally that the polythene bag is fogged. If not, simply heavily water again, leave 20 minutes and re-seal. Any cuttings that die should be removed to minimise disease.
This method is slightly more prone to fungal attack and therefore is most effective if propagation is delayed until September.
Many large heather producers use this approach on a commercial scale, placing plug trays on heated beds with shallow sides. Polythene sheet is stretched across the bed and is turned every 3 or 4 days to minimise fungal attack. The cuttings are routinely sprayed with a non-systemic imidazole fungicide.
Weaning
Care has to be taken to wean the cuttings from the humid atmosphere once rooted. On dull days, the polythene cover should be lifted slightly for an hour to start with, gradually increasing the period until the cover can be completely removed.
Growing on
The rooted cuttings can either be potted on or planted out in a nursery bed.
Transplanting is best done in early spring, but if the cuttings are sufficiently well rooted by September, they can be potted on and over-wintered in a cold-frame.
Knock the cuttings out of the seed tray in a similar manner as one would a plant from a pot. Divide the cuttings from each other using an old knife.
Place the relatively dry compost into a 9cm pot (smaller sizes are more prone to drying out) and lightly firm. Make a hole in the centre of the pot and plant the cuttings deeply, burying any bare stems so that the lower foliage rests on the soil surface. Make sure that the cuttings have been firmed in well. Water heavily and place the pots outside in a well drained, not too exposed area.
If the nursery bed approach is adopted, prepare the ground well, removing all weeds and adding sufficient grit, acid sand and sphagnum moss peat to create a fine tilth. A dressing of general fertiliser such as John Innes base at 55 grams per square metre will help to produce strong healthy plants.
Water regularly throughout the spring and summer. Rapid growth will be made, so, to ensure a shapely plant, prune all Erica carnea back to 3cm to 5 cm at least once during the growing on period.
For most cultivars, rooted cuttings transplanted in spring should be ready to be planted out in their final positions by the following autumn but some Erica carnea cultivars may need another growing season.
Use a proprietary ericaceous compost mixed 2:1 with horticultural perlite. The important feature to look for when purchasing compost is to ensure that it is suitable for ericaceous plants.
Alternatively, the compost made up for propagation of cuttings can be used (this time there is no need to sieve the peat). If this approach is taken, a weekly supplementary feed will be required using a proprietary liquid tomato fertilizer.
With peat becoming a diminishing resource, a considerable amount of research is being conducted to find an alternative to peat. Peat-based composts have been optimized over a number of years and a complex science has developed describing how nutrient and water holding capacity are determined in such media. Several alternatives are being pursued and no doubt more will be investigated, but at present, composts based on coconut fibre or wood fibre are unsatisfactory.
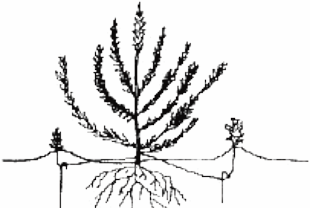
By careful planning, a new heather garden can give a colourful display in 3 to 4 years, which will require little maintenance and will last 15 to 25 years. Heathers are best planted in beds totally devoted to themselves, except for the addition of a few conifers to provide contrast in height and form.
The first decision that has to be made is whether to have a heather bed designed to peak at a particular time of year or whether to have a bed which has something in flower for most of the year. The “peaked” bed will give a spectacular display for 6 to 10 weeks and then by judicious use of foliage varieties will give a subdued but still colourful display for the rest of the year. If space permits, using several beds peaked for different seasons overcomes any doubts about this approach.
Alternatively, “all-year-round” beds give a near continual display without ever being spectacular and have the advantage where only a few heathers can be grown.
A heather bed should be positioned in full sun, away from deciduous trees, and if possible, sited so that the main view is from the south, as foliage heathers always colour better on their southern side. The bed should be informal in shape and preferably, contain no straight lines.
Clear the site of all weeds, particular care being given to perennial weeds such as bindweed and ground elder.
On heavy clay soils, break up any panned subsoils and incorporate copious amounts of well soaked sphagnum moss peat or any other fibrous soil conditioner. Sand, pea grit, or perlite can also be added to improve soil texture but avoid the use of sedge peat and spent mushroom compost unless you are planning to plant lime tolerant species.
Estimate the planting area in square metres (square yards), deducting one square metre (square yard) for each conifer included. Then multiply by five (four) to obtain the number of heathers required. Use no more than one conifer per five (four) square metres (square yards) and use those attaining a height of one to three metres (yards) in ten years. Plan to use about ten different heather varieties but reduce this number if necessary to ensure that the minimum number of plants of a particular cultivar is three.
Some species of heather require acid soil conditions to thrive, whereas others will grow in most soils. Therefore, before you can decide which heathers to grow you do need to know the alkalinity of your soil. The degree of alkalinity or acidity of your soil is measured on a scale of 0 to 14 known as the pH scale. Soils vary from very acid with a pH scale of 3.5 to very alkaline with a pH just over 8. Ericaceous plants require significant quantities of iron, which in soils with a pH above 6.5 is rendered virtually insoluble and hence iron deficiency sets in, causing the plant to yellow and then die.
If you do not know your soil pH, purchase a soil testing kit. Kits are available at most Garden Centres. Try to obtain the type containing test tubes already filled with the testing liquid. Dry the soil very slowly (overnight) before testing, to get the most accurate result. Avoid using pH probes which require no battery, also widely available in Garden Centres, as these do not produce sufficiently accurate results.
The species chosen, therefore, will depend, to some extent, on whether the soil is acid or alkaline. If your soil is acid, you can grow any heather cultivars. The chart below will help you select the species for you soil type:-
For those whose pH is greater than 6.5, the best advice is to restrict your choice to Erica carnea, Erica x darleyensis, Erica erigena, Erica manipuliflora, Erica vagans and any of the tree heaths with the exception of Erica arborea.
Heathers benefit from an annual pruning and the following schedule may be of assistance.
Calluna vulgaris
Each February or March, prune long flowering spikes back to plant. Trim off all flower heads.
Daboecia cantabrica
Each February or March, trim off dead flowers and seed pods, to make bushy growth.
Erica carnea
Every other April or May, trim flower heads with shears. Trim the more vigorous cultivars hard to stop the centre going bare.
Erica ciliaris
Each April or May, trim off dead flowers.
Erica cinerea
Each February or March, trim off dead flowers particularly long flowering spikes.
Erica tetralix, Erica x stuartii
Each April or May, trim off dead flowers.
Erica arborea, Erica australis, Erica erigena, Erica scoparia, Erica terminalis, Erica x veitchii
After flowering, trim half of previous year’s growth for the first four years to encourage bushy growth; trim off broken branches. Stake for support.
Erica x darleyensis, Erica x oldenburgensis
Trim each June. Do not be afraid of limiting growth.
Erica manipuliflora, Erica x griffithsii, Erica multiflora, Erica vagans
Leave flower heads on for russet colours during winter. Trim every March. Do not be afraid of limiting growth.
Erica spiculifolia
Each February or March, trim off dead flowers.
Erica x watsonii, Erica x williamsii
Trim hard, every other year in March.
In general, trimming retards the flowering by two to three weeks.
A heather garden should be planted in a position where it will be unshaded for all or most of the day and, if possible, facing south. Planting on dry sites or under trees should be avoided. Bold plantings of groups of 5 or more of each cultivar give a good overall effect, but single cultivars, chosen to contrast or complement each other can look attractive in a small garden.
Where possible beds should be of informal shape with no straight edges. Plan on using 5 plants per square metre (4 plants per sq. yard) making allowances for other small leaved shrubs planted with the heathers.
Plant deeply with the lower foliage resting on the soil surface.
It is safer to assume that Cape heaths must not receive a frost, although certain species are known to survive about 5 degrees Celsius of frost. As a result they are best regarded as a cool greenhouse plant, although they can be grown indoors under certain conditions. They are invariably grown in pots.
Despite enduring long hot and dry summers in South Africa most cultivated heathers hate being dry and this is the greatest danger. So keep pots or planters on a bed of pebbles which are kept wet at all times. Water the foliage from time to time as well, particularly in summer. Heathers rarely show sign of wilting so it is already too late if significant leaf drop occurs.
If heathers are kept indoors, they require a cool and well-lit moist atmosphere. The best places are usually a kitchen, bathroom, conservatory or even a sheltered porch.
When purchased most plants will be already pot-bound. Knock the plant out of its present pot, if the roots are brown (rather than white) then it needs potting on in a lime-free compost. Tear open the base of the root-ball as this will encourage new root growth. Repeat this operation annually. The earlier this is done after purchase, the greater the chance of survival.??Prune immediately after the flowers have faded by simply trimming off the dead flowers. They should not be pruned too hard i.e. into old wood as most heathers will not sprout new foliage from old wood.
Place the pots outside when risk of severe frosts has passed, keeping them WELL IRRIGATED DAILY. Feed with a liquid tomato fertiliser as directed by the manufacturer. Provide protection once again when severe frosts are likely.
Most Cape heaths form tall shrubs and it is advisable to prune strong leading shoots for the first year to produce a compact plant. However, the plant usually flowers on these long spikes and, therefore, a choice has to be made between flowers and the shape of the plant in the early years.
“Painted” or “dyed” heathers are heathers, almost always plants of Calluna vulgaris (ling or Scotch heather), which have been sprayed all over with a dye. Therefore, instead of being the typical darkish green one expects of a living heather, they are garishly coloured: bright, florescent blue, red, yellow, orange and pale green. The dyes used are evidently water- and weatherproof because they do not wash off in rain. The colouring also appears not to fade in sunlight.
Information about the dyes used is difficult to obtain, apart from the general assertion that they are “food dyes”.
To be effective, the dye has to be sprayed all over the heather. This treatment cannot be good for a living plant. Any plants I have purchased have been dead within a short time. The dyes are undoubtedly harmful to the plants by inhibiting photosynthesis and transpiration.
“Painted” heathers need the same growing conditions that all Calluna cultivars require: lime-free, moist soil and full sunlight. They are frost-hardy.
These artificially dyed plants are not indoor plants – they should be grown outdoors either planted in a container (tub, window-box) or into a flower-bed. However the garish colours are not appropriate for most garden situations.
What happens next? Providing the heather is alive and lives, new shoots should appear in spring. These will not be coated with the dye so they should be green (or turn green). Gradually the dyed foliage should be shed and a fully green plant will gradually develop.
In short, “painted” or “dyed” heathers are as artificial as plastic flowers – heather enthusiasts should not be tempted to waste money on them.
Heathers have been sprayed for decorative purposes. Plants will grow through to their natural colour in time. Best grown for one season.